榕树的随想

Sky Jia


  • 首页

  • 分类

  • 归档

  • 标签

  • 搜索

For Faith

发表于 2018-06-14 |

Sky:有信仰的活着!

UserScript: 一键展开 GitHub PR 评论

发表于 2018-02-25 | 分类于 技巧 |

最近一段时间工作花了很多功夫在GitHub上做Code Review,夸张的时候一天需要Review将近20个Pull Request,不得不说这是一个很耗精力和体力的事情。

在GitHub Review PR 的时候,遇到一个很蛋疼的事情:

很多提交的Review Comments在Code Owner重新提交有关修改的Commit之后GitHub PR页面里会把这些Comments折叠起来。如果要查看之前提交的内容,需要一个个手动点击Show outdated 按钮。

Outdated Comments

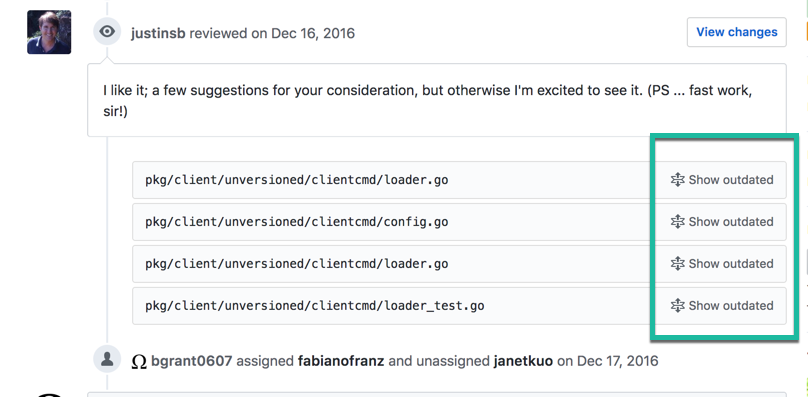
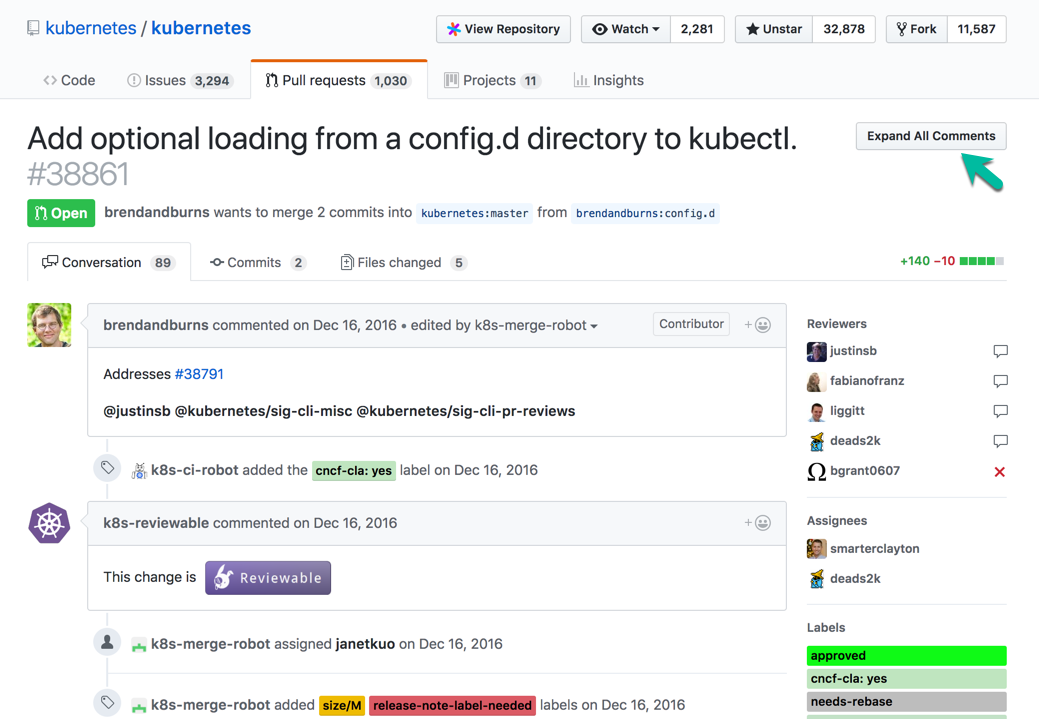
秉着重复三次就得用程序解决的原则,写了一个油猴脚本,可以在PR页面里面注入一个Expand All Comments按钮,一键展开全部Outdated Comments。

show-all

脚本已经发布到GitHub和OpenUserJS上了,希望有同样蛋疼体验的同学能舒缓一下。

  • GitHub: https://github.com/skyjia/expand-pr-comments
  • OpenUserJS: https://openuserjs.org/scripts/skyjia/Expand_All_PR_Comments

您可能需要为浏览器安装一个油猴脚本管理器插件:

  • 推荐 Tampermonkey: https://tampermonkey.net/

我的 dotfiles

发表于 2017-07-17 |

My Dotfile Repository: https://github.com/skyjia/dotfiles

兼容 macOS 与 Linux

1
2
3
4
5
6
7
8
9
10
11
12
13
14
15
16
17
18
19
20
21
22
23
24
25
26
27
28
29
30
31
██ ██ ████ ██ ██
░██ ░██ ░██░ ░░ ░██
░██ ██████ ██████ ██████ ██ ░██ █████ ██████
██████ ██░░░░██░░░██░ ░░░██░ ░██ ░██ ██░░░██ ██░░░░
██░░░██░██ ░██ ░██ ░██ ░██ ░██░███████░░█████
░██ ░██░██ ░██ ░██ ░██ ░██ ░██░██░░░░ ░░░░░██
░░██████░░██████ ░░██ ░██ ░██ ███░░██████ ██████
░░░░░░ ░░░░░░ ░░ ░░ ░░ ░░░ ░░░░░░ ░░░░░░
▓▓▓▓▓▓▓▓▓▓
░▓ about ▓ A couple of dotfiles for developers using OS X.
░▓ author ▓ Sky Jia <me@skyjia.com>
░▓ code ▓ https://github.com/skyjia/dotfiles
░▓▓▓▓▓▓▓▓▓▓
░░░░░░░░░░
bash > bash settings
fish > fish settings
gdb > GDB init
git > global git config and aliases
hg > global hg config and aliases
httpie > httpie settings
karabiner > Karabiner configuration
less > less settings
omf > oh-my-fish settings
opam > opam init
shared_profile > shared shell settings, alias, and custom prompts
spacemacs > spacemacs initialization setting and custom layers for Emacs.
tmux > terminal multiplexer with custom status bar
vim > vim settings
zsh > zshell settings, aliases, and custom prompts

Before Getting Start

It’s best to read the follwing articles before you start:

  • GitHub Dotfiles Guide
  • Awesome Dotfiles

Installation

1 Install Dependencies

Homebrew & Cask

If you’re an OS X user, the best way to manage software pacakges is to use Homebrew & Cask.

a) Install Homebrew

1
ruby -e "$(curl -fsSL https://raw.githubusercontent.com/Homebrew/install/master/install)"

b) Install brew cask

1
brew tap caskroom/cask

Refer to:

  • http://brew.sh/
  • https://caskroom.github.io/

For Linux user, please try LinuxBrew instead.

GNU stow

I recommend to use GNU stow to manage dotfiles, because it’s free, portable, and lightweight.

Install stow with homebrew:

1
brew install stow

2 Clone and Apply dotfiles

1
2
git clone https://github.com/skyjia/dotfiles.git ~/dotfiles
cd ~/dotfiles && rake

If you want to apply a configuration package, try to execute following commands:

1
2
cd ~/dotfiles
stow package_dir_name

For example, apply httpie configuration package:

1
2
cd ~/dotfiles
stow httpie

3 Package Configuration

vim

Vim configuration is based on Janus. Install MacVim and Janus as followed:

1
2
3
4
5
6
7
8
9
brew cask install macvim
# install janus
# https://github.com/carlhuda/janus#installation
cd
curl -L https://bit.ly/janus-bootstrap | bash
cd ~/dotfiles
stow vim

tmux

tmux configuration is based on gpakosz/.tmux.

1
2
cd ~/dotfiles
stow tmux

spacemacs

1
2
3
git clone https://github.com/syl20bnr/spacemacs ~/.emacs.d
cd ~/dotfiles
stow spacemacs

GitHub Repository: https://github.com/skyjia/dotfiles

Kali Linux 安装后配置

发表于 2017-07-16 |

写作本文时,使用的是 Kali Linux 2017.1

1
2
3
4
Distributor ID:Kali
Description:Kali GNU/Linux Rolling
Release:kali-rolling
Codename:kali-rolling

工作环境:VirtualBox VM on MacBook Pro
内容持续更新。

基本系统配置

切换到root用户

su

判断kali版本

lsb_release -a

更新 Packages

  • 首次启动先执行更新。
  • 日常维护每四天更新一次。
1
2
3
4
5
6
7
apt-get clean
apt-get update && apt-get upgrade && apt-get dist-upgrade
#linux内核更新
apt-get install linux-headers-$(uname -r)
apt-get autoremove && apt-get clean

配置 OpenSSH Server

安装配置 openssh-server:

1
2
3
4
5
6
7
8
9
10
apt list openssh-server
# If not see the version with [installed], use this command to install it
apt install openssh-server
# To backup the original keys first as a precaution use
mkdir /etc/ssh/default_keys
mv /etc/ssh/ssh_host_* /etc/ssh/default_keys/
# Regenerate the keys
dpkg-reconfigure openssh-server

修改 /etc/ssh/sshd_config文件:

1
2
3
PermitRootLogin yes
PasswordAuthentication yes
PubkeyAuthentication yes

启动服务:

1
2
3
systemctl start ssh.socket
systemctl enable ssh.service
systemctl start ssh.service

参考:

  • http://lmgsecurity.com/blog/2017/05/18/enable-start-ssh-kali-linux/
  • https://www.tecmint.com/disable-or-enable-ssh-root-login-and-limit-ssh-access-in-linux/

添加新用户

1
2
3
4
5
6
# 添加新用户 skyjia
useradd -m skyjia
# 添加到 sudo 组
usermod -a -G sudo skyjia
# 添加到 vboxsf 组 (支持 VirtualBox 文件共享访问)
usermod -a -G vboxsf skyjia

配置VM网卡

为Kali 的 VM 配置两个网卡:

  • Adapter 1: NAT,用于通过Host与外网连接通讯;
  • Adapter 2: Host-only Adapter,用于 VM 与 Host 通讯。

由于默认情况下各个网卡会从DHCP获取配置,并设置网关,但操作系统中只能允许一个默认网关,因此我们需要修改下网络连接设置。

登录 Kali,打开 Network 配置工具,为每个网卡配置独立的 Profile:

  • Ethernet (eth0)
    • Profile 名称: NAT-Auto
    • 启用 IPv4 ( Automatic DHCP)
    • 禁用 IPv6 (如果不使用)
  • Ethernet (eth1)
    • Profile 名称: Host-Only
    • 启用 IPv4 ( Automatic DHCP)
    • 禁用 IPv6 (如果不使用)
    • 勾选 Use this connection only for resources on its network 选项

Gnome桌面

配置 HiDPI

由于工作环境使用的是Retina显示屏,需要对桌面进行HiDPI设置,以达到正常文字显示效果。

  1. 在VirtualBox中修改虚拟机设置:

    Display > HiDPI Support: 勾选Use Unscaled HiDPI Output

  2. 修改完成后重启虚拟机;

  3. 登陆Kali,在 Tweak Tool 中设置,将 Windows > HiDPI > Window scaling 设定为 2.

  4. 执行命令,修改桌面界面缩放比例:

    1
    gsettings set org.gnome.desktop.interface scaling-factor 2

禁用桌面锁屏

Settings > Power > Power Saving: Never

个性化设置与常用软件

dotfiles

我的 dotfiles: https://github.com/skyjia/dotfiles

科学上网

TBD

注意事项

避免安装Flash Player

任何时候都不要装。

不要在你安装的kali 2.0中添加额外的源

  • 如果因为某些原因,在安装kali过程中,当被问到使用网络镜像时选择了No,可能会导致你的sources.list文件中丢失一些条目。如果是这种情况,检查一下官方的源列表来确定哪些条目应该在那个文件中。即使很多非官方的说明让你这样做,你也应该避免在sources.list文件中添加多余的源。
  • 不要添加kali-dev, kali-rolling 或者任何其他的kali源除非你有特别的理由,一般情况下你是没有的。
  • 如果你不得不添加额外的源,在/etc/apt/sources.list.d/目录下添加一个新的源文件。

npm extraneous error 经历

发表于 2017-05-05 |

今天在例行检查清理 npm package 时遇到了狗血的npm ERR! extraneous问题:

1
2
3
4
5
6
7
8
9
10
11
12
13
14
15
16
17
18
19
20
21
22
23
24
25
26
27
28
29
$ npm ls -gp --depth=0
/usr/local/lib
/usr/local/lib/node_modules/babel-eslint
/usr/local/lib/node_modules/bower
/usr/local/lib/node_modules/browserify
/usr/local/lib/node_modules/coffee-script
/usr/local/lib/node_modules/doctoc
/usr/local/lib/node_modules/electron-prebuilt
/usr/local/lib/node_modules/eslint
/usr/local/lib/node_modules/eslint-plugin-react
/usr/local/lib/node_modules/gitbook-cli
/usr/local/lib/node_modules/google-protobuf
/usr/local/lib/node_modules/graceful-fs
/usr/local/lib/node_modules/grunt-cli
/usr/local/lib/node_modules/gulp
/usr/local/lib/node_modules/gulp-cli
/usr/local/lib/node_modules/hexo-cli
/usr/local/lib/node_modules/js-beautify
/usr/local/lib/node_modules/less
/usr/local/lib/node_modules/npm
/usr/local/lib/node_modules/protobufjs
/usr/local/lib/node_modules/tern
/usr/local/lib/node_modules/typescript
/usr/local/lib/node_modules/vue-cli
/usr/local/lib/node_modules/yo
npm ERR! extraneous: acorn@4.0.4 /usr/local/lib/node_modules/eslint/node_modules/acorn
npm ERR! extraneous: acorn-jsx@3.0.1 /usr/local/lib/node_modules/eslint/node_modules/acorn-jsx
npm ERR! extraneous: ajv@4.10.3 /usr/local/lib/node_modules/eslint/node_modules/ajv
.......

索性来个彻底的清理:

  • Global packages中,除了npm package,其它的package先全部删除
  • 安装cnpm,替代npm (你懂的),然后安装回所需的Global packages
1
2
$ # 删除npm之外的其它package
$ npm ls -gp --depth=0 | awk -F/ '/node_modules/ && !/\/npm$/ {print $NF}' | xargs npm -g rm

根据淘宝NPM镜像(https://npm.taobao.org/)安装指导,安装`cnpm`:

1
npm install -g cnpm --registry=https://registry.npm.taobao.org

原因分析

本地的node.js是使用Homebrew安装的,由于node版本更新,导致一些安装在global的package出现extraneous问题。修复方式是重新安装(或更新)有问题的package。

!!!此处敲黑板!!!

由于Homebrew管理的node会经常升级更新,并且cnpm默认会将package安装到当前运行版本的node安装文件夹之中,这个默认行为会在node再次升级后导致已安装的全局package失效。因此,我们需要手动修改npm的prefix设置。通过修改~/.cnpmrc,增加如下一行记录:

1
prefix = "/usr/local"

此时检查cnpm的配置会发现prefix的默认值已经被覆盖:

1
2
3
4
5
$ cnpm -g config ls -l | grep "prefix"
prefix = "/usr/local"
; prefix = "/usr/local/Cellar/node/7.9.0" (overridden)
save-prefix = "^"
tag-version-prefix = "v"

macOS 下以不同语言启动应用程序

发表于 2017-04-27 | 分类于 技巧 |

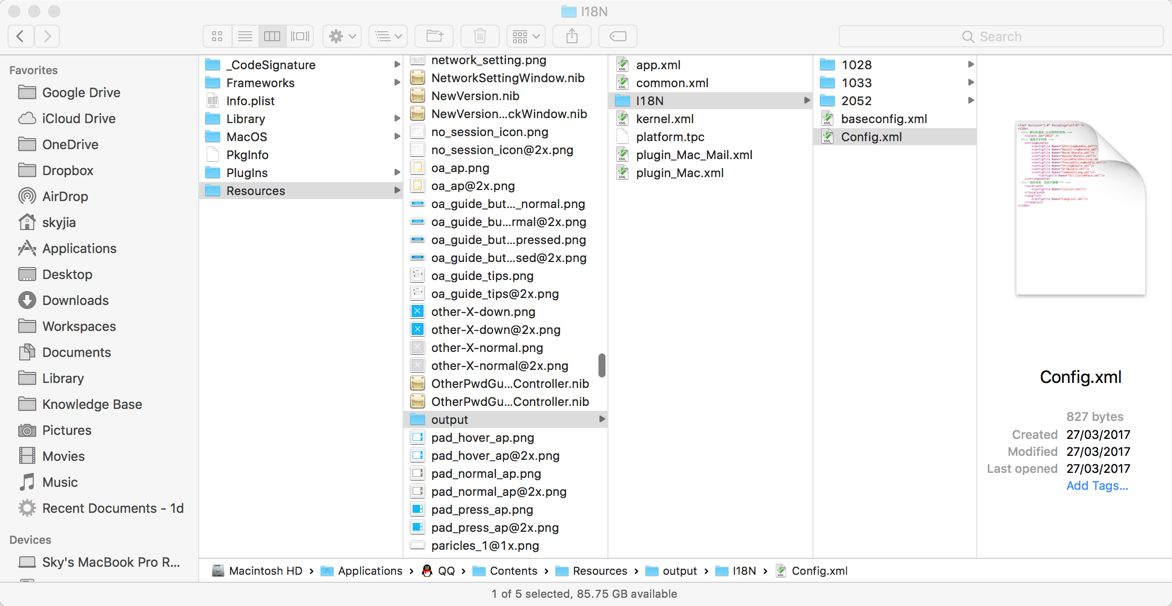
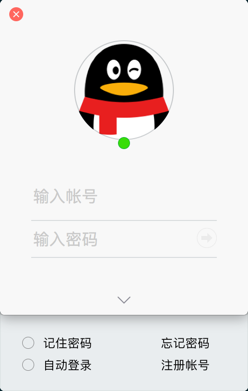
近日把Mac QQ升级到新版之后,看到这样一个英文版 Setting 界面时感觉别扭,应该属于强迫症间歇性发作,实在忍不住想切换到中文界面:

  • 文字格式和用语有差异
  • 不合格的英文翻译


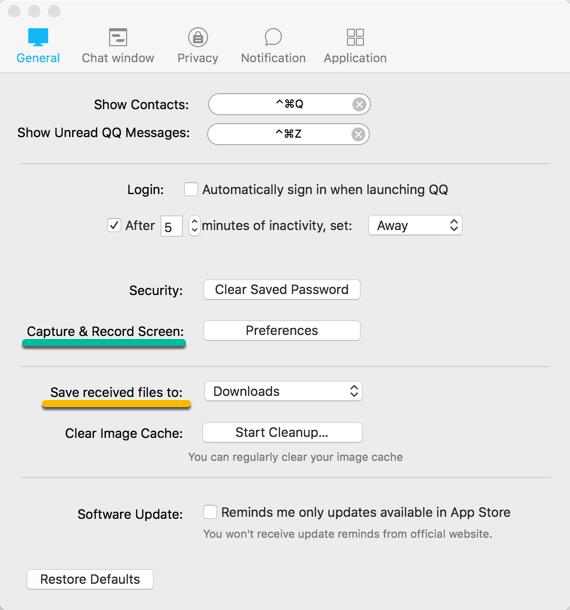
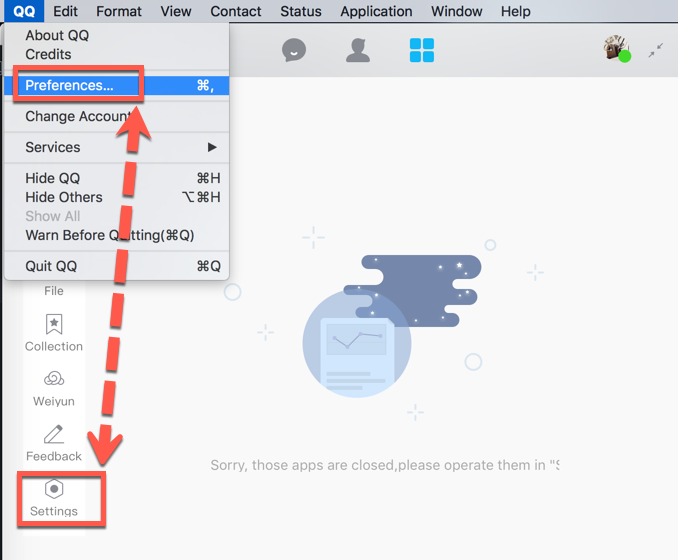
但是,Mac QQ并没有提供选择界面语言的选项,想通过软件内配置切换语言这条路是走不通了。其实Mac QQ是支持多语言的,默认行为是根据当前操作系统配置的语言首选项显示QQ的界面语言。通过 Show Package Contents 查看QQ应用程序可以看到内部支持的多语言配置文件信息:

我当前OS环境配置的系统语言是英文,暂时也不想将系统的语言改回中文,因此通过以下命令行方式指定语言并启动QQ:

1
$ open -a QQ --args -AppleLanguages '(zh-CN)'

实测环境:macOS Sierra 10.12.4

Sky Jia

Sky Jia

有信仰的活着

6 日志
1 分类
13 标签
GitHub
© 2018 Sky Jia
由 Hexo 强力驱动
主题 - NexT.Muse